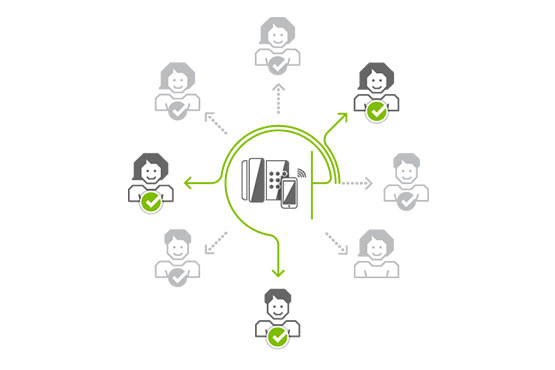
Video call is a form of direct interactive communication between two or more people through images and sounds over the Internet. It allows users who are far apart to connect to each other to communicate, share information, and conduct live chats through video and audio.
With the continuous development of technology, it is becoming more and more common to have to connect and communicate online. In an era where video calling has become an integral part of daily life, building a stable and quality video calling application is crucial.
Video call API (Application Programming Interface) is a part of software that provides features and application programming interface (API) for developing video chat applications. The API allows developers to create interactive live communication applications, allowing users to connect and transfer data directly between devices over the Internet.
The video call API provides features such as video chat, audio, text chat, and screen sharing. It also supports security features including data encryption, user authentication, and call monitoring. APIs can be integrated into existing applications, allowing developers to develop direct, interactive media applications with low response times.
Introduction
Stringee Call API is one of the powerful and easy to use tools for creating iOS video calling applications. With the Stringee Call API, you can create flexible video calling applications that meet the needs of your users.
In this article, we will show you how to use Stringee Call API to build a video calling application on the iOS platform. We'll go through the steps needed to implement the API, design the interface, and write the code to handle events during the video call.
Preparation
Before using Stringee Call API for the first time, you need a Stringee account. If you do not have a Stringee account, please register by following the link: https://developer.stringee.com/account/register
Create a Project on Stringee Dashboard 
Install Stringee SDK
To install Stringee SDK using CocoaPods, you need to follow these steps:
- Open the project Podfile and declare Stringee:
pod 'Strinee' - Run the following command on Terminal:
pod install --repo-update - Add some of the following config in Build Settings:
- Configure Camera and Microphone permissions in the file of Info.plist:
Design the theme
To start, we need to create an interface for our application, in this article we will use the following 3 ViewControllers to make video calls.
- StringeeConnectViewController screen that manages the client's state ( connect/disconnect) makes a call to another client.
- IncomingCallViewController Popup notification when an incoming call makes the event answer, or reject the call.
- CallingViewController The status management screen handles the logic of the call.

Logical processing
1. Make a connection to StringeeServer
In this class we will connect to Stringee Server.
import UIKit
import Stringee
class StringeeConnectViewController: UIViewController {
    private let userToken = "PUSH-YOUR-TOKEN-HEARE"

    let client = StringeeClient()

    private func setupStringee() {
        client.connect(withAccessToken: userToken)
    }
}
Implement StringeeConnectionDelegate to handle events related to the connection to StringeeServer:
import UIKit
import Stringee
class StringeeConnectViewController: UIViewController {
    private let userToken = "PUSH-YOUR-TOKEN-HEARE"

    let client = StringeeClient()

    private func setupStringee() {
        client.connectionDelegate = self
        client.connect(withAccessToken: userToken)
    }
}

extension StringeeConnectViewController: StringeeConnectionDelegate {
    func requestAccessToken(_ stringeeClient: StringeeClient!) {
        print("token exp")
    }
    func didConnect(_ stringeeClient: StringeeClient!, isReconnecting: Bool) {
        self.statusLbl.text = stringeeClient.userId
    }
    func didDisConnect(_ stringeeClient: StringeeClient!, isReconnecting: Bool) {
        self.statusLbl.text = "Disconnect"
    }
    func didFailWithError(_ stringeeClient: StringeeClient!, code: Int32, message: String!) {
        print("Connect Error ====> \(message ?? "")")
    }
}
2. Handle event when there is an incoming call
Implement StringeeIncomingCallDelegate to handle the event when there is an incoming call
import UIKit
import Stringee
class StringeeConnectViewController: UIViewController {
    private let userToken = "PUSH-YOUR-TOKEN-HEARE"

    let client = StringeeClient()

    override func prepare(for segue: UIStoryboardSegue, sender: Any?) {
        if let vc = segue.destination  as? IncomingCallViewController,
           let call = sender as? StringeeCall2 {
               vc.call = call
               vc.ansAction = { [weak self] in
                   DispatchQueue.main.async {
                       guard let self = self else { return }
                        self.performSegue(withIdentifier: "showCallScreen", sender: call)
                    }
                }
        }
    }
    private func setupStringee() {
        client.connectionDelegate = self
        client.incomingCallDelegate = self
        client.connect(withAccessToken: userToken)
    }
}
extension StringeeConnectViewController: StringeeIncomingCallDelegate {
    func incomingCall(with stringeeClient: StringeeClient!, stringeeCall2: StringeeCall2!) {
        DispatchQueue.main.async {
            if stringeeCall2.signalingState != .busy || stringeeCall2.signalingState != .ended {
                self.performSegue(withIdentifier: "showCallScreen", sender: stringeeCall2)
            }
        }
    }
}
3. Make a video call
When the user enters the UserID of the recipient of the call and presses the start video call button, we make a Video Call call as follows:
    override func prepare(for segue: UIStoryboardSegue, sender: Any?) {
        if let vc = segue.destination as? CallingViewController,
        let call = sender as? StringeeCall2 {
            vc.call = call
        }
    }
    @IBAction func didTapCall(_sender: Any) {
        if let fromUser = client.userId, !fromUser.isEmpty,
           let toUser = self.userIdTf.text, toUser.isEmpty, client.hasConnected {
               let call = StringeeCall(stringeeClient: client,from: fromUser, to: toUser)
               call?.isVideoCall = true
               performSegue(withIdentifier: "showCallScreen", sender: call)
           }
    }
4. Answer/Reject a call
import UIKit
import Stringee

class  IncomingCallViewController: UIViewController {
    @IBOutlet weak var userIDLBL: UILabel!
    var call: StringeeCall2!
    var ansAction: (() -> Void)?
    override func  viewDidLoad() {
        super.viewDidLoad()
        self.userIDLBL.text = "Call from \(call.from ?? "stringee")"
    }

    @IBAction func didTapReject(_ sender: Any) {
        call.reject { [weak self] status, code, message in
            guard let self = self else { return }
            if status {
                self.dismiss(animated: true)
            }else {
                print("Reject call error ===> \(code) - \(message ?? "")")
            }
        }
    }
    @IBAction func didTapAnswer(_ sender: Any) {
        self.dismiss(animated: true) {
            self.ansAction?()
        }
    }
}
5. Event handling and in-call logic
5.1. Call Setup
A call will have 2 cases:
- Incoming call: To initiate this call, we call call.initAnswer() before calling the function ***call.answer {status, code, msg in } *** to initiate a call.
- outgoing call: To initiate an output call we call the function call.make{ status, code, clientMsg, serverMsg in }
class CallingViewController: UIViewController {
    private func setupCall() {
        if call.isIncomingCall {
            call.initAnswer()
            call.answer { status, code,msg in }
        } else {
            call.make { status, code, clientMsg, serverMsg in }
        }
    }
}
Next we will assign the delegate to the viewController to listen for events during the call.
class CallingViewController: UIViewController {
    private func setupCall() {
        call.delegate = self
        if call.isIncomingCall {
            call.initAnswer()
            call.answer { status, code,msg in }
        } else {
            call.make { status, code, clientMsg, serverMsg in }
        }
    }
}
extension CallingViewController: StringeeCall2Delegate {
   func didChangeSignalingState2(_ stringeeCall2: StringeeCall2!, signalingState: SignalingState, reason: String!, sipCode: Int32, sipReason: String!) {
           DispatchQueue.main.async {
               switch signalingState {
                   case .calling:
                       self.status.text = "calling"
                   case .ringing:
                       self.status.text = "ringing"
                   case .answered:
                       self.status.text = "answered"
                   default:
                       self.navigationController?.popViewController(animated: true)
               }
           }
   }

   func didChangeMediaState2(_ stringeeCall2: StringeeCall2!, mediaState: MediaState) {
           DispatchQueue.main.async {
               self.status.text = mediaState == .connected ? "connnected" : "disconnect"
           }
   }
}
Show local video and remote video:
 extension CallingViewController: StringeeCall2Delegate {
    func didReceiveLocalStream2(_ stringeeCall2: StringeeCall2!) {
        DispatchQueue.main.async { [weak self] in
            guard let self = self else { return }
            stringeeCall2.localVideoView.frame = CGRect(origin: .zero, size: self.localVideo.frame.size)
            self.localVideo.insertSubview(stringeeCall2.localVideoView, at: 0)
        }
    }
    func didReceiveRemoteStream2(_ stringeeCall2: StringeeCall2!) {
        DispatchQueue.main.async { [weak self] in
            guard let self = self else { return }
            stringeeCall2.remoteVideoView.frame = CGRect(origin: .zero, size: self.remoteVideo.frame.size)
            self.remoteVideo.insertSubview(stringeeCall2.remoteVideoView, at: 0)
        }
    }
 }
5.2. Some other functions in video calls
Change to use front and back cameras:
    @IBAction func didTapSwitchCamera(_sender: Any) {
        call.switchCamera()
    }
Hang up the call:
    @IBAction func didTapHangup(_ sender: Any) {
        call.hangup { status, code, mess in
            if !status {
                print(mess ?? "")
            }
        }
    }
Microphone Mute/Unmute:
    @IBAction func didTapMute() {
        self.isMute = !self.isMute
        self.call.mute(self.isMute)
    }
Turn On/Off Camera
    @objc func didTapCameraBtn() {
        self.isEnableLocalVideo = !self.isEnableLocalVideo
        self.localVideo.isHidden = !self.isEnableLocalVideo
        self.call.enableLocalVideo(self.isEnableLocalVideo)
    }
Conclusion
In this article, we learned about Stringee Call API - a technology that allows integrating video and audio calling functionality into your application on the iOS platform. We learned how to install the Stringee SDK through CocoaPods, design the user interface for our application, and write the code to integrate the Stringee Call API.
In addition, this article also has a detailed video tutorial on how to integrate Stringee Call API into your application on the iOS platform. You can watch this video to get a clearer view on how to integrate Stringee Call API.
Finally, to get you off to a quick and easy start with the Stringee Call API, we've created a GitHub project mẫu. You can download and refer to the code from this project to start developing your application.
We hope this article helped you better understand the Stringee Call API and how to integrate it into your apps on the iOS platform. If you face any problem during Stringee Call API integration, please <a href = https://stringee.com/vi/contact-sales?utm_source=Blog&utm_medium=anchor_text&utm_campaign=huong-dan-viet-ung-dung-video-1-1-ios-stringee-call-api target = "_blank">contact to get support.
<key>NSCameraUsageDescription</key>
  <string>$(PRODUCT_NAME) uses Camera</string>
<key>NSMicrophoneUsageDescription</key>
  <string>$(PRODUCT_NAME) uses Microphone</string>
"Other linker flags" add "(inherited)"
"Enable bitcode" select "NO"
